
Back in October 2018, Apple introduced a bold new generation of the iPad Pro. Admittedly, at the time, I hadn’t paid too much attention to it. I’ve had one or two iPads before then, but had always found their size and performance to be somewhere in the awkward middle amongst my ecosystem of devices. But then the Photoshop demo hit the screen and I was hooked. Like, seriously hooked.
It wasn’t so much that Apple was touting the 3rd gen iPad’s capability to run a full version of Photoshop (which is still kind of insane if you think about it). It was that running a full version of Photoshop signaled a whole new world of possibilities that mobile devices were never capable of prior to that moment. As a photographer, my mind immediately raced towards the obvious question:
Could the iPad Pro replace my laptop in my photography workflow?
I glanced to the right at an entangled pile of power adaptors and external hard drives tethered to my laptop – a necessary evil to power my growing Lightroom catalog and years of RAW files. Geez, I certainly hope so, I prayed.
Fast forward to 2021 and you’d see me armed with a M1-powered iPad Pro (5th gen) surrounded by a beautifully orchestrated ensemble of apps and services powering a fully touch- and cloud-based photography workflow. That’s right: I took the plunge in 2018 in pursuit of a better way, and 3 years later, I don’t think I could ever go back to the now seemingly archaic process of editing on a computer.


In this tutorial, I’m going to cover what my photography workflow looks like today and what you need in order to replicate it, should you decide that it’s right for you. Remember: workflows are super personal and full of subjectivity, so take my recommendations with a grain of salt as you evaluate it for yourself!
Let’s dive in. Feel free to skip ahead as needed:
- Why is the iPad Pro better for photography?
- Devices, apps, and services I use
- My photography workflow
- Trade offs
Why is the iPad Pro better for photography?
Before I talk about my photography workflow, let me summarize why I think the iPad Pro has been beneficial and why you might enjoy it too.
Touch-based creative work
This is one of the most important reasons why I enjoy editing on the iPad Pro. Photography is a visual medium and there is an intangible joy that comes from being able to physically touch your work. As someone who grew up putting pencils to paper in order to produce creative work, editing photos through a mouse and keyboard just always felt a little disconnected to me.

Automated data management
There are things I like spending time thinking about, and then there’s data management. One of the worst parts of my old workflow was that I was constantly managing the transfer of data from one place to another. Between the SD card in my camera, the external hard drive of RAW files, the Lightroom catalog (for Lightroom Classic), and the exported images in Dropbox, data management felt like a prominent yet undeserving part of my photography workflow. In my current workflow, there’s a cleaner, more invisible (read: wireless), and likely even more secure approach to data management that lets me focus on what matters most: photography.

Mobility
This is a funny one to call out seeing as how travel has been on pause lately. That said, pre-pandemic, the ability to take my photography work on the road, on planes, and to all the destinations that I miss so dearly now, was a real godsend. I could do this previously with my laptop setup, but just the thought of the hard drives, cables, and adaptors needed to just power up Lightroom made me shy away from photography work on the go more often than not. But even with travel on hold, the ability to take my iPad Pro to the living room or kitchen for a completely untethered editing session is something I can’t celebrate enough.

Screen quality
I’m no screenaphile (is that a thing?), but short of Apple’s Pro Display XDR, I’ve struggled to find a better looking screen. And with the newest 12.9” iPad Pro that I’ve been using, I feel like I’m being truly spoiled with the Liquid Retina XDR display. What this practically translates into for me is a screen that gives more consistent color tones (super important especially when editing dark shots) and is easier on the eyes over several hours of work.

Performance
I’ll end this list on another benefit I've taken for granted on the iPad Pro: performance. My MacBook Pro is about 3 years old now, which is still relatively new, but already far outpaced by the releases in recent years. This makes my iPad Pro the fastest and most powerful device I have. In fact, the iPad Pro I picked up in 2018 (3rd gen) would still be the fastest device I have today. And while I haven’t had any complaints about speed with any of my previous iPad Pro's, the latest M1-powered model truly flies. Anything that launches Lightroom, loads adjustments, and renders photos faster is wonderful in my books.

Devices, apps, and services I use
Here’s a rundown of the key set of devices, apps, and services I use to power my photography workflow.
Devices (and accessories)
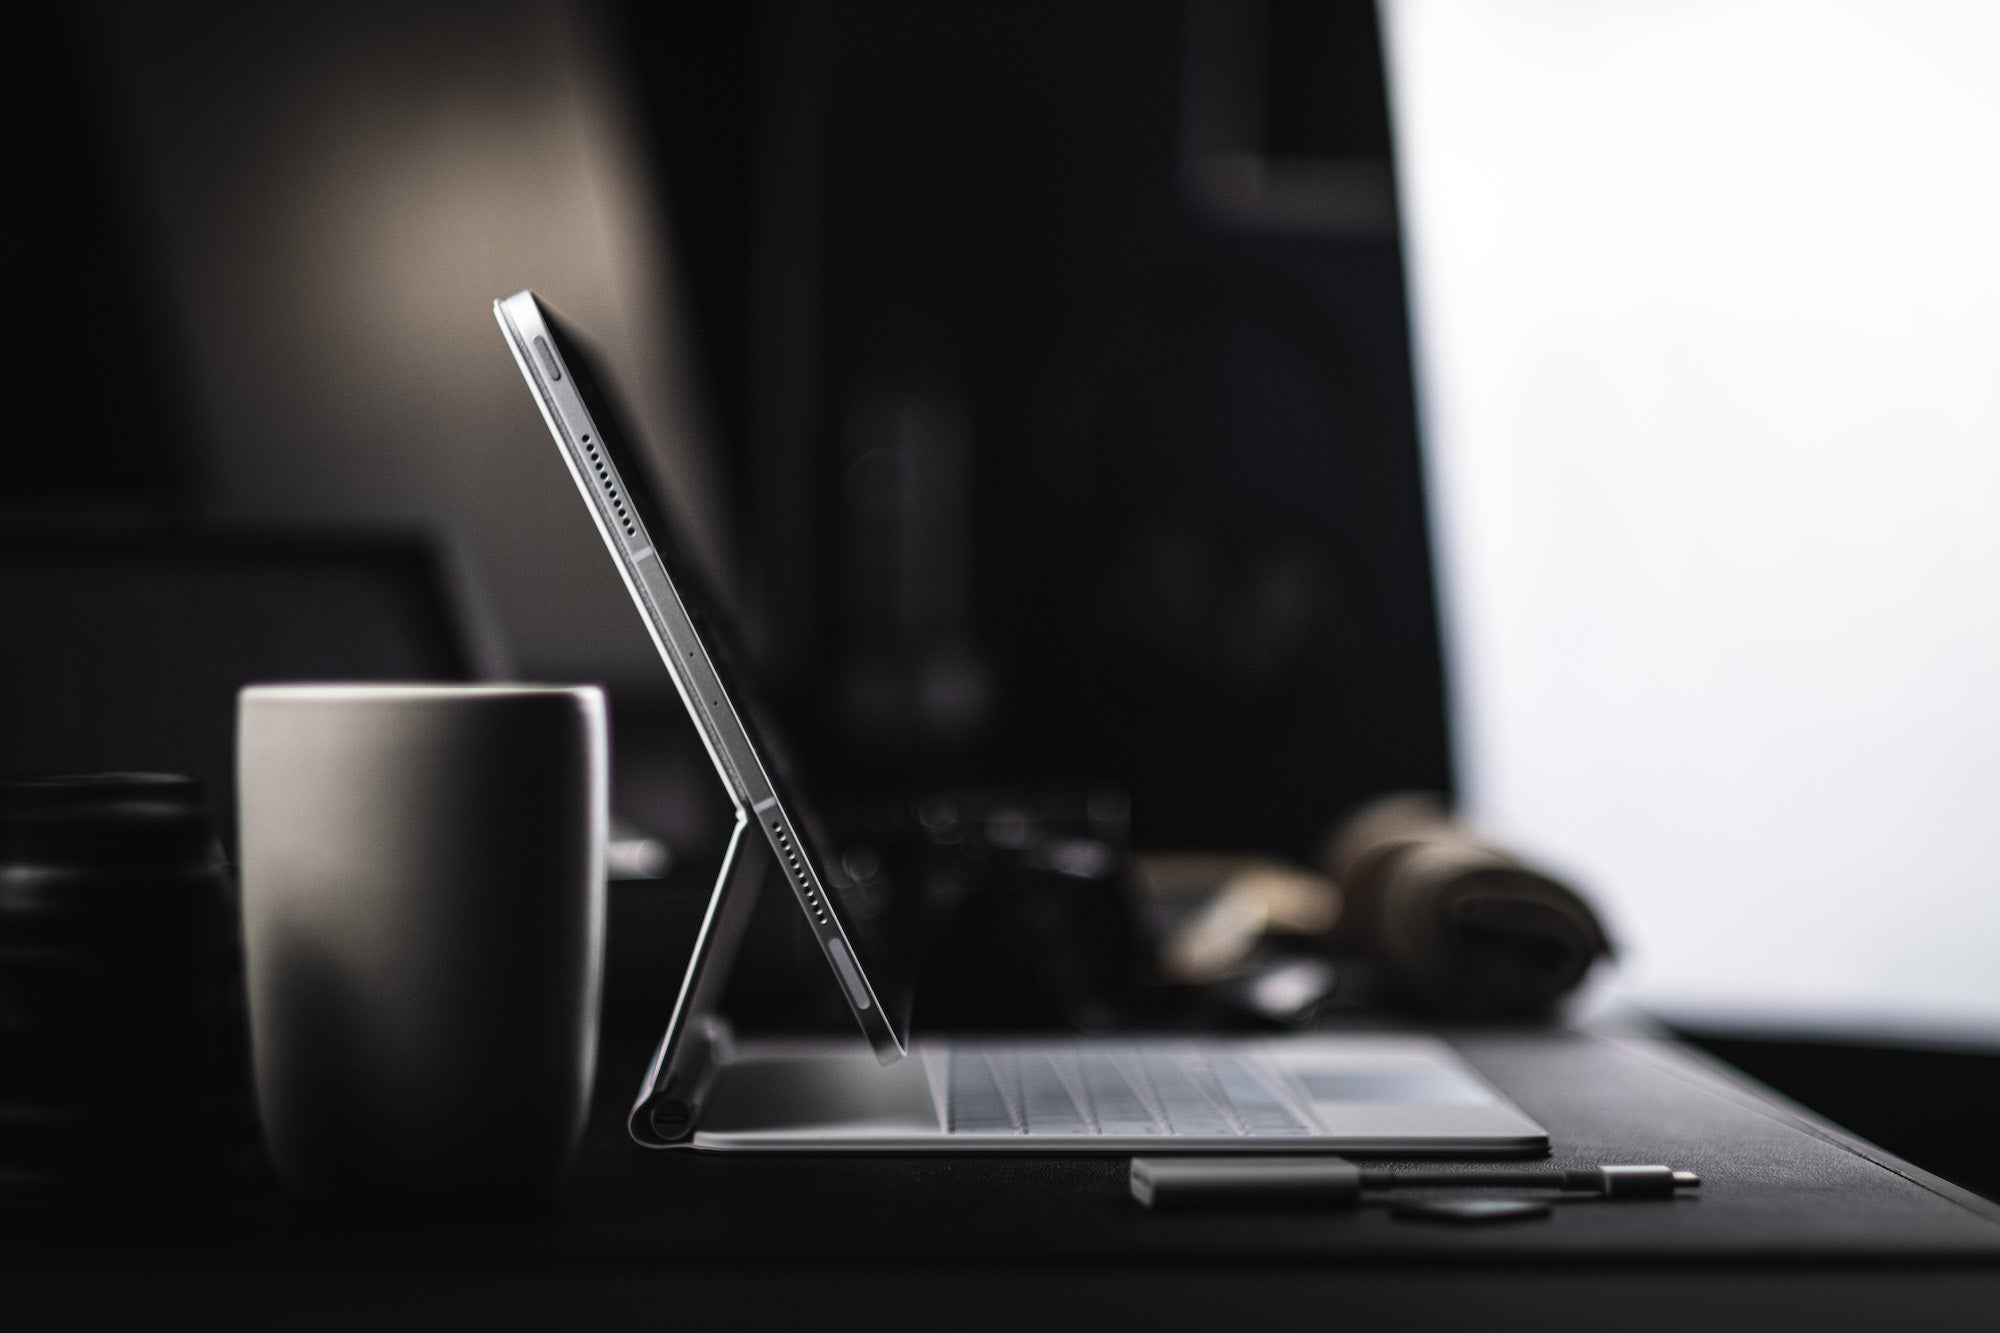
- Apple 12.9” iPad Pro (5th gen) – primary photo editing device
- Apple Pencil – for more precise editing (especially local adjustments)
- Apple USB-C SD Card Reader – for importing photos off an SD card
- Apple Magic Keyboard for iPad Pro – not critical, but makes typing and cursor control more efficient
Apps
- Photos app – for photo management (raw, selects, and edited photos)
- Adobe Lightroom for iPad (iOS version) – for photo editing
Services
- iCloud – for backup and syncing across devices (in Photos app)
- Adobe Creative Cloud - for backup and syncing across devices (in Lightroom)
Ready to see how all this comes together? Read on!
My photography workflow
Here it is, in all its glory. My full end-to-end photography workflow from camera to Instagram, with the iPad Pro at the heart of it.

1. Import photos from camera

To import the photos into the iPad Pro, I use a USB-C SD card reader (it can be any card reader, I just happen to have the basic Apple one). Alternatively, with my Fujifilm X100V, I can use a USB-C cable and plug my camera directly into the iPad Pro to grab the photos. This is especially helpful if I have my camera mounted on a tripod and don’t want to take it off until I know I’ve gotten the shot I want.
More: How to import photos using Apple camera adaptors
Once the SD card or camera is connected, I open the Photos app and tap on the card in the sidebar (under the Devices sub-heading). I then select an album to import to and either select specific photos or just tap Import All in the top right.
Within the Photos app, I have a folder for all my RAW photos, sub-divided into years, which are then further sub-divided into albums for specific shoots. I name each album according to the date and focus of the shoot, such as 2021-05-13 Reflections Tutorial, so they’re easier to browse later.
More: Organize photos in albums on iPad
A quick note on newer cameras and shooting JPEG+RAW
If you have a relatively new camera, the Photos app may not support your RAW file format yet (as it the case with my X100V still). The Photos app can still safely store your RAW file, but the photo thumbnail will be a grey square, which isn’t very helpful. The workaround here is to shoot in JPEG+RAW. When you do this, the Photos app will use the JPEG as the thumbnail. Photos will also intelligently “group” the JPEG and RAW files together as one photo so that you don’t have twice the number of photo files (one set for JPEG and one set for RAW).
2. Choose selects to edit
The next step is all about sorting through the sometimes-hundreds of photos to find the ones that are worth editing (often referred to as selects). As I browse through each photo, I’ll use the native Favorite feature in the Photos app to mark the ones I want to edit.


3. Edit in Lightroom

With my selects marked, I’ll head over to Adobe Lightroom to begin editing. First, I’ll create a corresponding album in Lightroom (using the exact same folder structure and naming convention as I have in the Photos app). Next, I’ll tap the Import button, tap From Camera Roll, and then filter by Favorites to grab the selects I chose earlier.
More:
Import photos in Lightroom for mobile
Work with albums in Lightroom on a mobile device
And then I edit. :)
Lightroom editing tips and presets
If you’ve made it this far into the tutorial, you might be wondering how I edit my photos. Good news: I have lots of tutorials on that exact topic! Like this one on My Lightroom Editing Workflow.
And if you're looking for a way to accelerate and supercharge your edits, check out my custom Lightroom preset pack. Every photo in this post (plus everything on my Instagram) was edited with these same presets. Happy editing!
Meanwhile, in the background, Adobe’s Creative Cloud service keeps all my edits and presets synced up so that I can access them on any device. While I’m not a fan of needing to subscribe to a second cloud storage service, I do appreciate the ability to pickup my edits on my phone.

4. Export edits to share
The last step is to export the edited photos from Lightroom back to the Photos app. For specific shoots with large sets of photos, I’ll create a new album to organize all the final photos. For one-off shots, I’ll just export and leave it unorganized in my Recents album. Like a savage.
And from the Photos app, my Instagram-ready shots go straight into the grid planning app I use before inevitably hitting my Instagram feed.
Photo storage, syncing, and backups
I haven’t talked about storage, syncing, and backups as a specific step because they just invisibly work in the background through iCloud. This means that all my RAWs and edited photos, as well as the photos taken on my iPhone, are automatically synced across all my devices without me needing to do anything specific.

And if that sounds like a lot of photos, it is! At the time of writing this, I have 94,488 photos that make up 2.05 TB available on all my devices. The way this is made possible is by turning on the Optimize Storage feature on my iPhone and iPad. This keeps only the actively accessed photos saved locally on the device in full resolution, while the rest is replaced with a low resolution version. If I need an older photo, the Photos app will just download the full resolution automatically when I open the photo. This way, the actual locally stored photos are reduced down to a more manageable 17.87 GB.
More: Manage your photo and video storage
Trade offs
One of the best pieces of advice I’ve been given is to avoid pursuing perfect solutions (because they rarely exist). Instead, pursue the best arrangement of trade offs that line up with my goals. So in that spirit, while the iPad Pro workflow checks a lot of boxes for me, I wanted to share some of the trade offs that I’ve also had to embrace.

Cloud storage plans
In order to support this new wireless life, I've had to invest in cloud storage services. In particular, I pay for an iCloud storage plan (comes with 5GB for free and upgrades start at $0.99/month for 50GB in the US) and an Adobe Creative Cloud storage plan (starts at $9.99/month). That said, I use iCloud for all things Apple, so it's not just for photography (though the bulk of the storage needs comes from photography). And Adobe Creative Cloud pricing also includes access to their apps, like Lightroom and Photoshop, so it's not strictly storage costs either.
Dollar amounts aside, I've essentially traded the cost of physical storage for cloud storage. Physical storage has continued to get cheaper over time, but also comes with the risk of being lost or damaged, or the data being corrupted. As such, for me, the convenience of going wireless felt like the right decision.
No physical storage
Risks aside, there are some who still prefer the familiarity of physical hard drives. Being able to see, hold, and control your data end-to-end is a sentiment I can certainly understand. While I put an above-average amount of trust in large technology companies to keep my data safe, not everyone has the same sense of confidence and security. For those, this workflow would take a bit more of a leap of faith. Personally, I haven't missed physical storage.
Screen size
One of the common questions I get about my workflow is whether I miss editing on a larger screen. My honest response is no. I value convenience and mobility a little more and find that an iPad Pro (especially the current 12.9" model I'm working with) is a perfect balance of portability and size. Plus, the new iPad Pro now features a Thunderbolt port that can support external displays with up to 6K resolution, so if I do want to see my work on a bigger screen, I could simply plug it into the 27" display on my desk.
I still need a laptop for some things
One of the bigger drawbacks for me is the fact that I can't do everything on an iPad yet. While the iPad Pro is an incredibly capable device, complex design work, coding, and a small handful of specialty tasks still require me to switch to a laptop. Ironically, this can sometimes make packing light challenging, as I may need to bring both devices on the road with me. Fortunately, as time goes on, more and more of my daily work is being better supported by the iPad Pro.
Cost
This is the most obvious trade off, in my opinion. There is no doubt that the iPad Pro is a premium product, and while it packs a ton of value, the question of whether it's worth the price tag (starts at $799 for the 11" and $1099 for the 12.9") is a personal decision. And because many people won't be able to shed their laptops just yet, it means that an investment into an iPad Pro workflow will be above and beyond any existing tech setup.
For me, photography is something I work on nearly every single day, so the value in the investment is clear to me. Even when I wasn't doing photography full-time though, the iPad Pro still felt like a worthy investment because of all the benefits I mentioned at the top of the article.
Investing in the future of creative tools
My iPad Pro photography workflow is undoubtedly a progressive approach that places my chips squarely in a future that is more mobile and cloud-based. As a creative, this is how I want to see my tools evolve. And because I get a kick out of using new technology, I don't mind the occasional drawbacks that come with it, even if it's sometimes more hopeful than practical.
In the last 3 years, I haven't come across many others who have invested equally into a workflow like this, so I wanted to do my part and report back on my findings. Whether it means I've convinced some of you to take the plunge yourself, or have more clearly ruled this approach out as an option, I hope I've contributed to helping you find the photography workflow that works best for you. Thanks for reading!
Have questions?
Post a comment below! I'll continue updating this tutorial to cover frequently asked questions that I haven't covered above.

19 comments
Brilliant post, excellent walk-through! I purchased my iPad Pro 12” a few months ago with the same intention, but with limited time due to my “day-job”, I have not spent the time to make the leap from my iMac and LRc. This is a big help and I love your presentation, very slick photography and design. I’ll be checking out your pre-sets as well. I just started a trial with Mylio and I am playing with that to back up ro my current back-up drives or “vaults” as they call them and it is pretty amazing. I might even use it for culling. Image search is awesome, and like LR, the images stored on the iPad are smaller but still able to edit non-destructively. And Mylio talks to LR. Anyway, really excited to give it a go since I already have the 2TB iCloud and LR plans. Cheers!
Great article thank you.
How much memory is required in the iPad for your workflow?
Does the optimisation option for photos offload the RAW files once you’ve finished editing? This has been my concern – the RAW chews up so much space.
Thanks
This is a well thought out post, answering all of my questions. I thought I’d share what I do, just to provide another use case.
As the unofficial family archivist, I needed a convenient way to capture and store memories that can be shared with extended family. I find the iPad to be a more convenient tool for travel. With an iPad, I can use the same power source to charge multiple devices, I can download movies from streaming services for plane rides, and I can easily connect my headphones. I’m not much of a photographer and I’m easily overwhelmed by Adobe CC, so I still use a PC for AI desktop editing tools in addition to my annual offline backups.
I use Apple Photos because it works best on iOS devices; however, Google allows me to work with multiple accounts on the same device, so I actually use Google Photos as my main photo storage site. I have my personal Google account for everyday activities (Gmail, YouTube, web history), but I share a separate Gmail account with my wife so we can easily see each other’s photos in near real time. Apple has improved a lot, but I believe Google is still better at editing image data (such as revising dates for scanned photos) and sharing with friends outside of the Apple ecosystem.
I got the same iPad as you, too! Though for other reasons (apple and iOS nerd ). Right now my photos are all over the place, but with a majority on a hard drive that is shared over my home network. That’s because I have over 6 TB of raws. Have you tried connecting to network shared physical hard drives from your new setup with iPad/iPad+Lightroom+photos?
Regarding cost, the rule of thumb is one should always have a backup of files somewhere other than house. So a couple years ago I went with Backblaze which stores all my MacBook files plus any attached drives. That’s about $70 a year per computer now. While not the same price as going all cloud based, the difference is becoming less and less each year.
This is really helpful and timely, I was just thinking I wonder if technology has advanced enough to support ditching the computer as much as possible. Especially as I’m on my iPad Pro all the time or my work Mac. I find myself with a stack of full memory cards and thinking hmm, maybe I can just take photos with my iPhone instead, the file management is so much easier. ;)
Thank you!